
Aurora & Night Sky
How to Photograph the Northern Lights with a Phone or DSLR
7 min read
How to Photograph the Northern Lights with a Phone or DSLR
Gear that helps
A camera with manual controls and a sturdy tripod is ideal, paired with a wide, fast lens (think f/2.8 or wider). But don’t despair if all you have is a phone — recent phones with a night mode can capture a surprisingly good aurora if you brace them on something solid. A remote or self-timer prevents shake either way.
Two cheap things matter more than an expensive body: a tripod that won’t creep, and a way to trigger the shutter without touching the camera. After that, think about the lens rather than the sensor. A wide lens at f/1.8 to f/2.8 will do more for your aurora photographs than any upgrade to the camera, and one that focuses smoothly by hand beats one that fights you in the dark.
The core settings
For a camera, start manual: aperture as wide as it goes, ISO between 1600 and 3200, and a shutter of a few seconds — long enough to gather light, short enough that active curtains don’t smear into a blur. Focus manually on a bright star or distant light, turn off the flash, and shoot in RAW if you can for flexibility later.
Treat those numbers as a starting point, not a recipe. A faint green arc sitting still may want eight or ten seconds; a bright, fast display will smear into mush at anything over two or three, and you are better off raising ISO and keeping the shutter short. Take a test frame, look at it properly, and adjust — the sky changes over minutes, so what worked at eleven o’clock can be wrong by midnight.
Composition
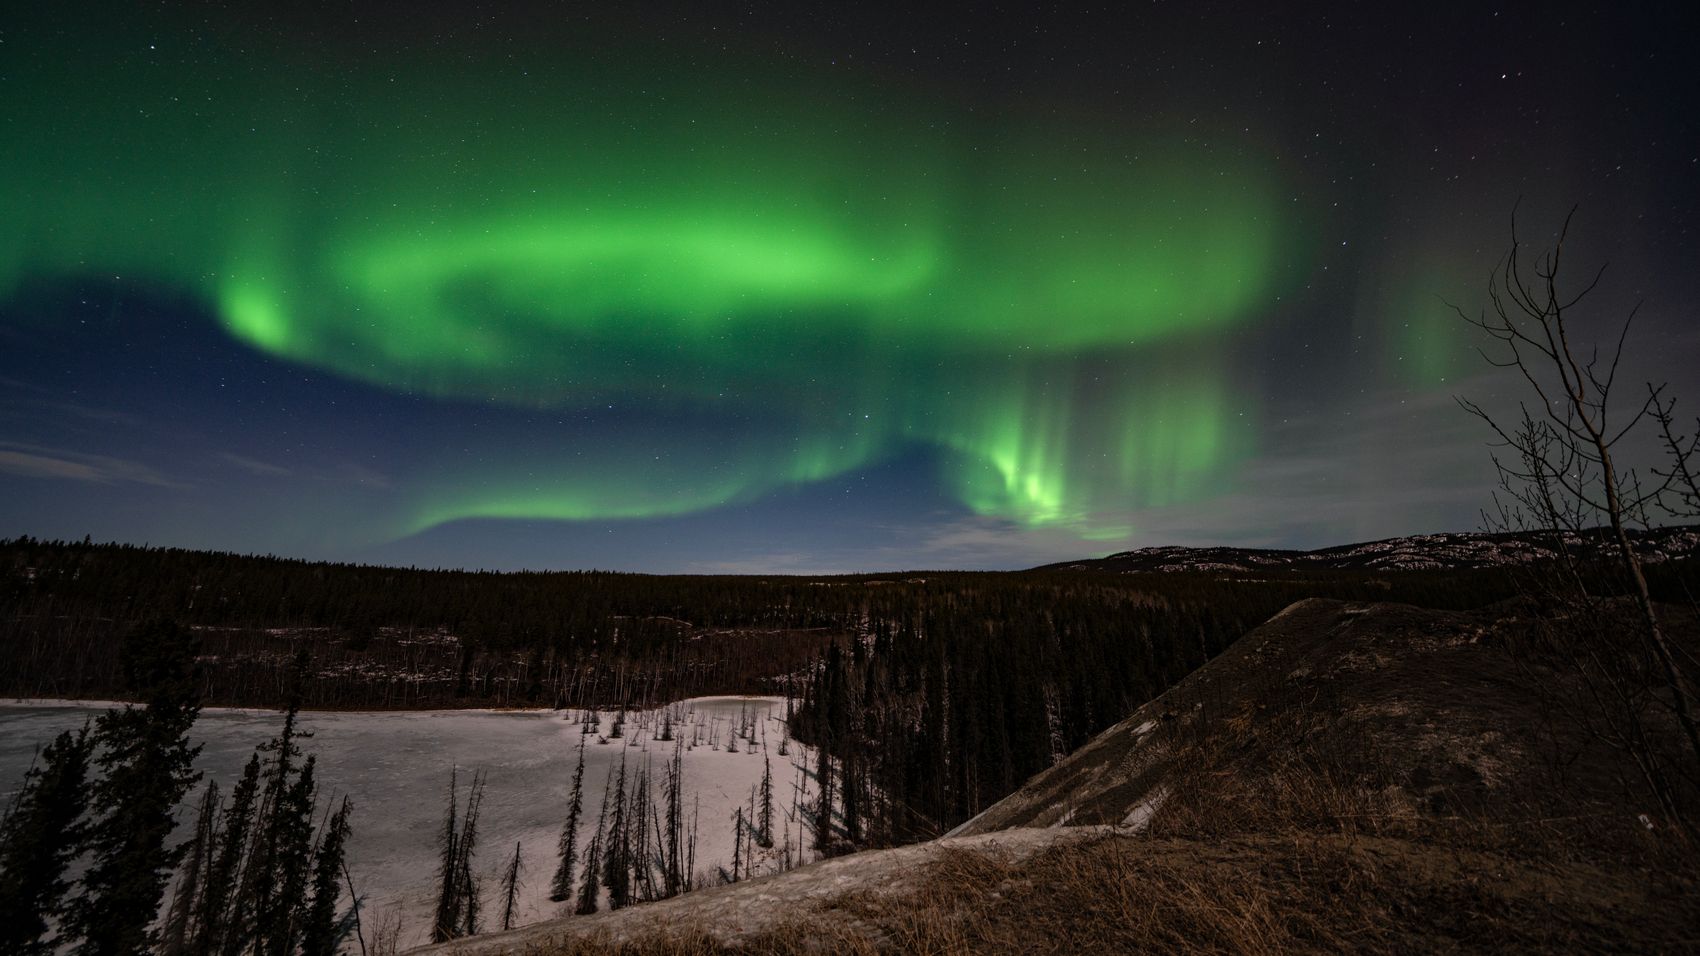
A great aurora photo needs a foreground. Place a frozen lake, a ridge, a lone spruce, or a cabin in the frame to give scale and a sense of place. Get low, use the rule of thirds, and let the sky fill the upper two-thirds when the display is high.
Scout the foreground in daylight if you can. Finding a good silhouette in the dark, on ice, with cold hands, is harder than it sounds, and the better spots usually need a short walk from wherever you park. Watch the direction too: the aurora often builds in the north, so a foreground that faces roughly north gives you somewhere to point when it starts.
Phone tips
Enable night mode, prop the phone on a rock, wall, or mini tripod, and hold dead still for the multi-second capture. Lock focus and exposure if the app allows, and turn off the flash. Wipe condensation from the lens, which forms fast in the cold.
Know the limits. Phone night modes stack several frames, which works well on a slow, glowing band and badly on a fast one — you get colour and shape but not sharp structure. Shoot in the phone’s raw or pro mode if it has one, stay on the native wide lens rather than pinching in to zoom, and expect to do more work afterwards than you would with a camera file.
Stay warm and patient
Batteries drain rapidly in the cold, so carry spares in an inside pocket. Dress for standing still in deep cold, bring a headlamp with a red light to protect your night vision, and give the sky time — the best displays often come after midnight.
Nail the settings once and the rest is practice. Then, crucially, put the camera down for a while and simply watch — the photos are a souvenir, but the memory is the point.
When to go, and where to stand
The Yukon aurora season runs roughly from late August to mid-April, because you need real darkness and there is almost none of that around the summer solstice. Late autumn and late winter tend to be the practical sweet spots: dark for long enough to give you a proper window, and not yet as punishing as the depths of January.
You don’t need to go far from Whitehorse. Twenty minutes out of town on almost any road puts you clear of the worst light, and the roads towards Fish Lake, north up the Klondike Highway, or out along Lake Laberge all get used for this. Further afield, Tombstone Territorial Park and the country around Dawson City give you dark skies and mountain foregrounds, but they also mean long drives and real winter conditions, so plan accordingly.
Reading the forecast
Two things decide whether you get a photograph: activity and cloud. Aurora forecasts give a rough activity index a day or so ahead, but they are probabilities rather than schedules, and a quiet forecast can still produce a very good hour. Cloud cover is the harder constraint, and it is the one to check first.
The moon is the third variable and the one people forget. A full moon lights the landscape beautifully and washes out faint aurora; a new moon gives you the faintest structure and a black foreground. Neither is wrong, but knowing which you are working with tells you whether to expose for the sky or for the ground.
Common mistakes
The recurring ones are simple. Autofocus left on, so every frame is soft. Image stabilisation left on while the camera is locked to a tripod, which can introduce the shake it exists to remove. A lens fogged by being carried from a warm truck straight into cold air. And shooting a whole night at one setting because the first frame looked fine on a small screen.
The other mistake is location panic — driving from spot to spot chasing a better view instead of settling somewhere with a decent foreground and waiting. Displays come in waves. The people who get the good frames are usually the ones already set up and pointed the right way when the sky finally goes off.
After the shot
Raw files from a cold, dark night almost always need work: lift the shadows a little, pull the white balance towards what your eye remembers rather than what the camera guessed, and be restrained with saturation. Aurora green is already an unusual colour, and pushing it hard is the fastest way to make a real photograph look fake.
Noise reduction is a trade-off. Heavy reduction smooths out the fine vertical structure in the curtains, which is often the most interesting thing in the frame. If you shot a series, stacking a few frames of the same static scene will clean up noise without destroying that detail.
Frequently asked questions
Can I photograph the aurora with a phone?
Yes. Modern phones with a night mode can capture the aurora well if you steady the phone on a solid surface or tripod and hold still for the multi-second exposure.
What camera settings should I start with?
Try manual mode: widest aperture, ISO 1600–3200, and a shutter of a few seconds, focused manually on a bright star. Adjust based on how bright and active the display is.
Why do my batteries die so fast?
Cold drains camera batteries quickly. Carry spares in an inside pocket to keep them warm and swap them as needed.
When is aurora season in the Yukon?
Roughly late August to mid-April. The months around the summer solstice never get dark enough, so there is effectively no aurora viewing from May through July.
Do I have to leave Whitehorse to shoot it?
Not necessarily, but twenty minutes out of town away from streetlights makes a large difference to what the camera records. Any dark spot with an open view to the north will do.
Where to stay
Rooms worth pairing with this guide.

Ready to plan this trip?
Real prices for the places this piece names.


